ARKit and Core Location: Part One
- 19 minsNavigation With Linear Algebra

ARKit and CoreLocation: Part One
ARKit and CoreLocation: Part Two
ARKit and CoreLocation: Part Three
Background
It has been awhile since I’ve written a new blog post so hopefully, this makes up the difference. This post and the next will be a two part series on my experiments with ARKit and CoreLocation! The first part will deal with the basics of ARKit, getting the directions from MapKit as well as touch on the basics of matrix transformations. The second part will deal with calculating the bearing between two locations and how to take the location data and translate that into a position in the ARKit Scene.
Introduction
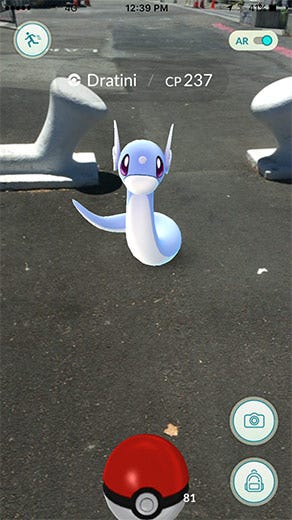
Mention “augmented reality” and the first thing that jumps into most people’s head is PokemonGO. If you’re like most people, you’ve probably played it once or twice (or obsessively.) PokemonGO proved that when it comes to setting, nothing beats our world. As awesome as PokemonGO was, it was a slight glimpse into the depth and potential of the augmented reality experience.
Augmented reality (AR) describes user experiences that add 2D or 3D elements to the live view from a device’s camera in a way that makes those elements appear to inhabit the real world. ARKit combines device motion tracking, camera scene capture, advanced scene processing, and display conveniences to simplify the task of building an AR experience.
With iOS 11, Apple has unleashed the power of ARKit onto the iOS development community. We’re still several weeks out of iOS 11 going live, but what we’re already seeing looks likely to redefine what is possible for the mobile user experience.
First, Some Fundamentals

Personal Project — August 20th
So, it’s magic right? I hate to be the one to say this but no, it’s just math. So if it isn’t magic how do they pull it off? Visual Inertial Odometry! (Say it ten times fast.)
Definitions
Visual Inertial Odometry (VIO): ARKit analyzes the phone camera and motion data in order to keep track of the world around it. The computer vision logs noticeable features in the environment and is able to maintain awareness of their location in the real world regardless of the iPhone’s movement.
Apple is a huge fan of organizing code around sessions. Sessions are a way of encapsulating the logic and data contained within a defined period of the applications activity. With URLSession this is the logic and data when your application sends network requests and receives data in back in return.
ARSession : In ARKit the ARSession coordinates the logic and data necessary to create the augmented reality experience. This includes camera and motion data and calculations required to keep track of the world as it moves around.
ARFrame: An ARFrame contains a video frame data and position tracking data which gets passed along to the ARSession in the currentFrame property. ARKit marries that image data with the motion tracking data to calculate the iPhone’s position.
ARAnchor : An ARAnchor is a position in the real world that maintained regardless of motion or position of the camera (theoretically). It’s anchored to a specific position, and for the most part will remain there.
ARWorldTrackingConfiguration : is a configuration for tracking the devices orientation, position and for detecting feature points like surfaces that are recorded by the camera. ARConfigurations connect the physical world which you and the phone exist in with the virtual coordinate space generated by your phone based on the camera and motion data.
worldAlignment: The worldAlignment property on ARSession defines how the ARSession interprets the ARFrame’s motion data on a 3D coordinate mapping system that is uses to keep track of the world and build the Augmented Reality experience.
Creating an AR experience depends on being able to construct a coordinate system for placing objects in a virtual 3D world that maps to the real-world position and motion of the device. When you run a session configuration, ARKit creates a scene coordinate system based on the position and orientation of the device; any ARAnchor objects you create or that the AR session detects are positioned relative to that coordinate system_._
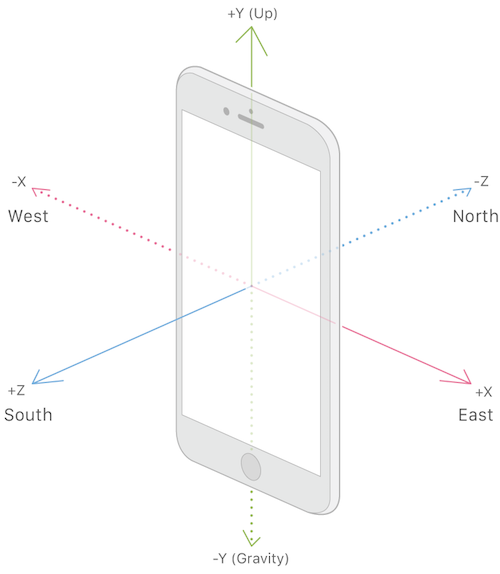
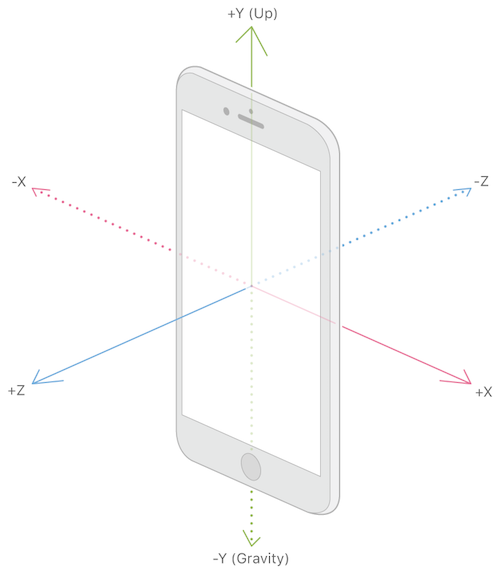
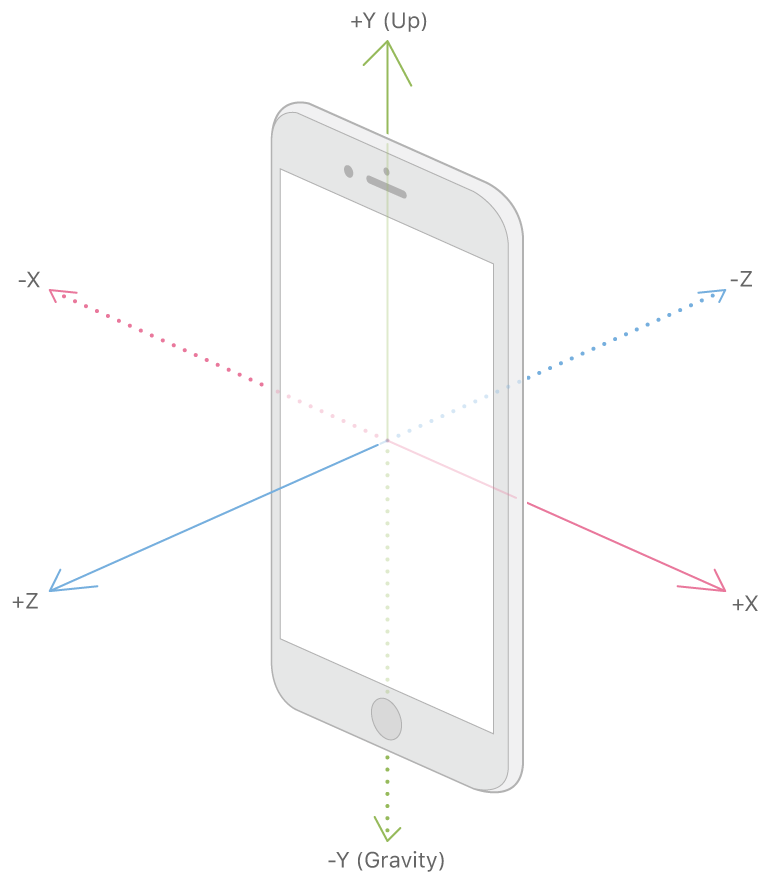
gravity: By setting the alignment to gravity ARKit aligns the y-axis parallel to gravity and the z and x axes are oriented along the original heading of the device.
worldAlignment.gravity — Apple Docs
The position and orientation of the device as of when the session configuration is first run determine the rest of the coordinate system: For the z-axis, ARKit chooses a basis vector (0,0,-1) pointing in the direction the device camera faces and perpendicular to the gravity axis. ARKit chooses a x-axis based on the z- and y-axes using the right hand rule—that is, the basis vector (1,0,0) is orthogonal to the other two axes, and (for a viewer looking in the negative-z direction) points toward the right.
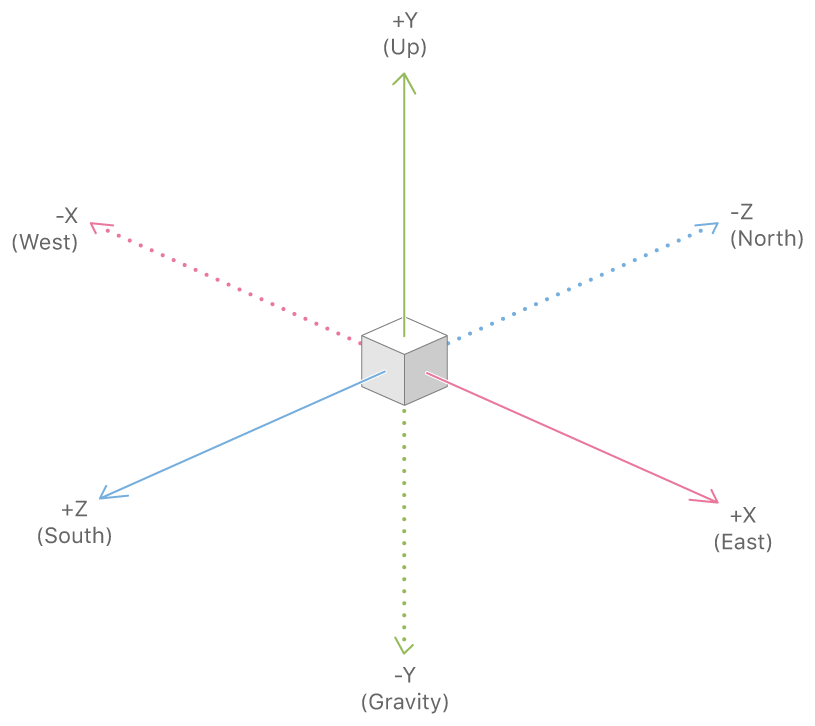
gravityAndHeading: By setting the alignment to gravityAndHeading ARKit aligns the y-axis parallel to gravity and the z and x axes orient towards compass heading. The origin is placed at the initial location of the device. While this is accurate most of the time, it’s precision is not incredibly high so creating an immersive augmented reality experience while solely relying on this data can be tricky.
worldAlignment.gravityAndHeading — Apple Docs
Although this option fixes the directions of the three coordinate axes to real-world directions, the location of the coordinate system’s origin is still relative to the device, matching the device’s position as of when the session configuration is first run.
SceneKit
One of the coolest things about ARKit is that it integrates well with Apple’s existing graphics rendering engines: SpriteKit, Metal and SceneKit. The one I’ve used the most has been SceneKit which is used for rendering 3D objects.
Personal project — August 11th
Definition
ARSCNView : ARSCNView is a subclass of SCNView which is the standard SceneKit view for rendering 3D content. Because it is specialized for ARKit, it has some really cool features already baked in. For one, it provides seamless access to the phone’s camera. Even cooler, the world coordinate system for the view’s SceneKit scene directly responds to the AR world coordinate system established by the session configuration. It also automatically moves the SceneKit camera to match the real movement of the iPhone.
Personal project — August 12th
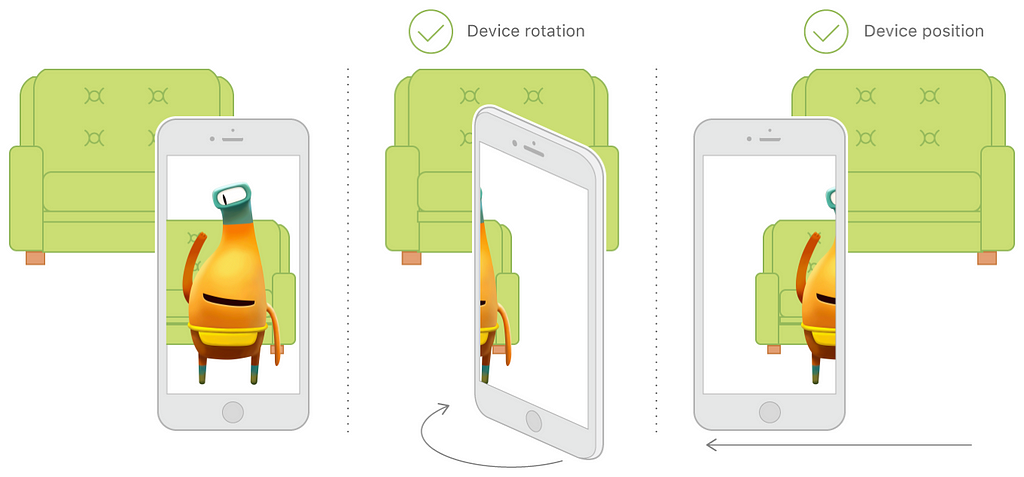
Because ARKit automatically matches SceneKit space to the real world, placing a virtual object such that it appears to maintain a real-world position requires only setting that object’s SceneKit position appropriately.> You don’t necessarily need to use the ARAnchor class to track positions of objects you add to the scene, but by implementing ARSCNViewDelegate methods, you can add SceneKit content to any anchors that are automatically detected by ARKit.
Adding Node To Scene
Before we go any further let’s get something basic out of the way. Let’s build our first augmented reality experience! To do this, we’re going to place a blue orb 1 meter in front of the camera.
Definitions
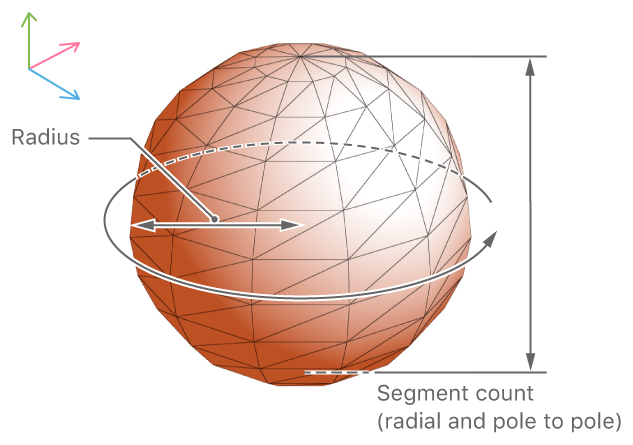
SCNSphere : A sphere defines a surface whose every point is equidistant from its center, which is placed at the origin of its local coordinate space. You define the size of the sphere in all three dimensions using its radius property.
A three-dimensional shape (also called a model or mesh) that can be displayed in a scene, with attached materials that define its appearance.
SphereNode Sphere Code
import UIKit
import SceneKit
import ARKit

class ViewController: UIViewController, ARSCNViewDelegate {

   @IBOutlet var sceneView: ARSCNView!

    override func viewDidLoad() {
        super.viewDidLoad()
        // setup
    }

    // viewWillAppear & viewWillDisappear

    func createSphereNode(with radius: CGFloat, color: UIColor) -> SCNNode {
        let geometry = SCNSphere(radius: radius)
        geometry.firstMaterial?.diffuse.contents = color
        let sphereNode = SCNNode(geometry: geometry)
        return sphereNode
    }
}
sceneView.scene = SCNScene()
// Add Scene
let circleNode = createSphereNode(with: 0.2, color: .blue)
// Add Sphere
circleNode.position = SCNVector3(0, 0, -1) // 1 meter in front
// Give sphere position
sceneView.scene.rootNode.addChildNode(circleNode)
// Add to scene as childNode of rootNode
Putting It Together
import UIKit
import SceneKit
import ARKit

class ViewController: UIViewController, ARSCNViewDelegate {

    @IBOutlet var sceneView: ARSCNView!

    override func viewDidLoad() {
        super.viewDidLoad()
        sceneView.delegate = self
        sceneView.showsStatistics = true
        sceneView.scene = SCNScene()
        let circleNode = createSphereNode(with: 0.2, color: .blue)
        circleNode.position = SCNVector3(0, 0, -1) // 1 meter in front of camera
        sceneView.scene.rootNode.addChildNode(circleNode)
    }

    override func viewWillAppear(_ animated: Bool) {
        super.viewWillAppear(animated)
        let configuration = ARWorldTrackingConfiguration()
        sceneView.session.run(configuration)
    }

    override func viewWillDisappear(_ animated: Bool) {
        super.viewWillDisappear(animated)
        sceneView.session.pause()
    }

    func createSphereNode(with radius: CGFloat, color: UIColor) -> SCNNode {
        let geometry = SCNSphere(radius: radius)
        geometry.firstMaterial?.diffuse.contents = color
        let sphereNode = SCNNode(geometry: geometry)
        return sphereNode
    }
}
SceneKit and ARKit coordinates are quantified in meters. When we set the the last property on the SCNVector3 to -1 we set the z axis to to one meter in front of the camera. If everything goes according to plan (it should) the screen will display something like this:
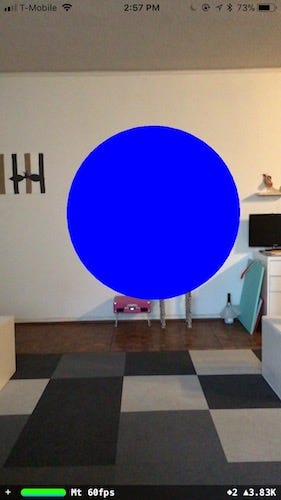
For now this approach works fine. Our sphere will automatically appear to track a real-world position because ARKit matches SceneKit space to real-world space. If we want to use coordinates, we’re probably going to need to find something durable to anchor * hint * our node to in the future.
Vectors and Matrice and Linear Algebra, Oh No!
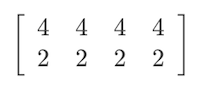
A two by four matrix.
If you remember back to math class, a vector has a magnitude and a direction.
In mathematics, physics, and engineering, a Euclidean vector (sometimes called a geometric or spatial vector, or — as here — simply a vector) is a geometric object that has magnitude (or length) and direction.> — Wikipedia> When it comes to programming, a vector is just an array of numbers. Each number is a “dimension” of the vector.
To start off simply, well use a 2 by 1 matrix for our vector. Let’s give it a value of x = 1. The vector (1, 0) graphed looks like:
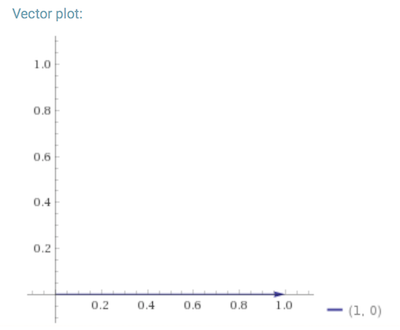
We can express that same vector (1, 0) in a very simple matrix:
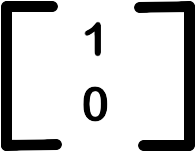
X over Y
As stated above:
a vector is just an array of numbers
As you can see, a matrix looks similar to an array of numbers. While they can seem intimidating, under the hood, matrices are quite a simple concept and simple to work with after you’ve practiced a bit.
Definition from OpenGL :
Simply put, a matrix is an array of numbers with a predefined number of rows and columns
Matrices are used to transform 3D coordinates. These include:
- Rotation (changing orientation)
- Scaling (size changes)
- Translation (moving position)
Transformations
In most cases a transformed point can be expressed in this equation:
Transformed Point = Transformation Matrix × Original Point
If you’ve worked with CoreGraphics before you’ve probably seen something called CGAffineTransform. It makes for some pretty cool animations. In fact, CGAffineTransform is just a different type of matrix transformation.
Affine transformation is a linear mapping method that preserves points, straight lines, and planes.

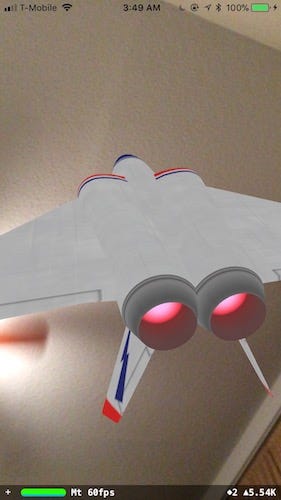
Rotating A Space Ship
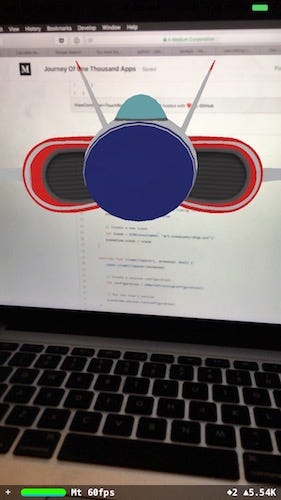
Let’s give transformations a try! While this isn’t the same way that they are used for the location nodes, they are close enough that you can start thinking about the principles in action. To do this create a new ARKit project with SceneKit. When you run it, there should be a spaceship floating in front of your screen like in the screenshot above.
Loop-T-Loops
Add the following lines below your viewDidLoad:
class ViewController: UIViewController, ARSCNViewDelegate {
    override func touchesBegan(_ touches: Set<UITouch>, with event: UIEvent?) {
        sceneView.scene.rootNode.childNodes[0].transform = SCNMatrix4Mult(sceneView.scene.rootNode.childNodes[0].transform, SCNMatrix4MakeRotation(Float(Double.pi) / 2, 1, 0, 0))
        sceneView.scene.rootNode.childNodes[0].transform = SCNMatrix4Mult(sceneView.scene.rootNode.childNodes[0].transform, SCNMatrix4MakeTranslation(0, 0, -2))
    }
}
Now when you re-run it, the spaceship should still appear on your screen, however, when you tap it, it should loop around. Keep tapping it until it is back in the position it started (roughly).
Here is the full ViewController code:
class ViewController: UIViewController, ARSCNViewDelegate {
@IBOutlet var sceneView: ARSCNView!
override func viewDidLoad() {
super.viewDidLoad()
// Set the view's delegate
sceneView.delegate = self
// Show statistics such as fps and timing information
sceneView.showsStatistics = true
// Create a new scene
let scene = SCNScene(named: "art.scnassets/ship.scn")!
sceneView.scene = scene
}
override func viewWillAppear(_ animated: Bool) {
super.viewWillAppear(animated)
// Create a session configuration
let configuration = ARWorldTrackingConfiguration()
// Run the view's session
sceneView.session.run(configuration)
}
override func touchesBegan(_ touches: Set<UITouch>, with event: UIEvent?) {
sceneView.scene.rootNode.childNodes[0].transform = SCNMatrix4Mult(sceneView.scene.rootNode.childNodes[0].transform, SCNMatrix4MakeRotation(Float(Double.pi) / 2, 1, 0, 0))
sceneView.scene.rootNode.childNodes[0].transform = SCNMatrix4Mult(sceneView.scene.rootNode.childNodes[0].transform, SCNMatrix4MakeTranslation(0, 0, -2))
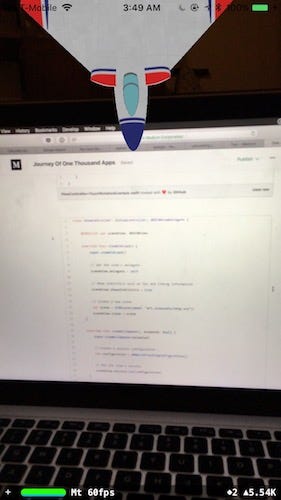
}
}If everything goes according to plan, after a few touchs, your spaceship will look like it is making glorious touch-down:
Navigation
Now that we have a bit of a handle on the basics of ARKit let’s move on to navigation and location services. If we want to get be guided to our destination, we’ll need a bit of help from a navigation service.
MapKit comes with a handy turn-by-turn directions API. Using CoreLocation a destination and MKDirectionsRequest we can get an array of navigational steps to follow that will lead us to a specific location.
import MapKit
import CoreLocation

struct NavigationService {

   func getDirections(destinationLocation: CLLocationCoordinate2D, request: MKDirectionsRequest, completion: @escaping ([MKRouteStep]) -> Void) {
        var steps: [MKRouteStep] = []

        let placeMark = MKPlacemark(coordinate: CLLocationCoordinate2D(latitude: destinationLocation.coordinate.latitude, longitude: destinationLocation.coordinate.longitude))

        request.destination = MKMapItem.init(placemark: placeMark)
        request.source = MKMapItem.forCurrentLocation()
        request.requestsAlternateRoutes = false
        request.transportType = .walking

        let directions = MKDirections(request: request)

        directions.calculate { response, error in
            if error != nil {
                print("Error getting directions")
            } else {
                guard let response = response else { return }
                for route in response.routes {
                    steps.append(contentsOf: route.steps)
                }
                completion(steps)
            }
        }
    }
}
Definitions
MKPlacemark s: contain information like city, state, county or street address that associated with a specific coordinate.
MKRoute :
A single route between a requested start and end point.An MKRoute object defines the geometry for the route—that is, it contains line segments associated with specific map coordinates. A route object may also include other information, such as the name of the route, its distance, and the expected travel time.
print(route.name)

// Broadway

print(route.advisoryNotices)

// []

print(route.expectedTravelTime)

// 2500.0
is one segment of a route. Each step contains a single instruction that should be completed by a user navigating between two points in order for them to successfully complete their route.
print(step.distance)

// 1.0

print(step.instructions)

// Proceed to 7th Ave
MKMapItem : A point of interest on the map. A map item includes a geographic location and any interesting data that might apply to that location, such as the address at that location and the name of a business at that address.
MKDirections : A utility object that computes directions and travel-time information based on the route information you provide.
import SceneKit
import ARKit
import CoreLocation
import MapKit

class ViewController: UIViewController, ARSCNViewDelegate, ARSessionDelegate, LocationServiceDelegate {

    @IBOutlet weak var sceneView: ARSCNView!

    var steps: [MKRouteStep] = []
    var destinationLocation: CLLocationCoordinate2D!
    var locationService = LocationService()

    override func viewDidLoad() {
        super.viewDidLoad()

        locationService.delegate = self
        var navService = NavigationService()

        self.destinationLocation = CLLocationCoordinate2D(latitude: 40.737512, longitude: -73.980767)
        var request = MKDirectionsRequest()

        if destinationLocation != nil {
            navService.getDirections(destinationLocation: destinationLocation, request: request) { steps in
                for step in steps {
                    self.steps.append(step)
                }
            }
        }
    }
}
Personal project — August 13th
Sources:
github.com/ProjectDent/ARKit-CoreLocation
movable-type.co.uk/scripts/latlong.html

Chris Webb
The journey of one thousand apps starts with a single key press...